Podcasts
What is a Podcast?
At it simplest, a podcast can be defined as “downloadable asynchronous audio”, this practical definition highlights key components of the medium (Middleton 2010) and provides us with a starting point for examining the key benefits of using podcasting for edcuators and students.
Benefits for students
- Downloadable – Podcasts are portable, students can listen where and how they like.
- Asynchronous – Listen on demand, pause, rewind and review.
Research around the effect of podcasting on the learning experience finds several examples of their positive impact on students by filling an ‘important needs gap by allowing learners to continue the learning activities when it might not normally be possible’ (Evans 2008).
A case study by The University of Leicester highlights that ‘Podcasts increased learner engagement with the guidance and support that was already available … They enabled tutors to convey key, clear and detailed messages in an effective and motivating manner, which was highly appreciated by students … The evidence showed that podcasting added a human dimension to the learning experience. Compared with reading course materials, articles and textbooks, listening to the tutors’ voices added a personal touch and livened up the learning experience.’ (JISC, University of Leicester).
This is also in line with anecdotal evidence we have seen at the University of Derby on the use of podcasts to aid with assessment in Marketing programmes.
Benefits for educators
- Quick to create
- Easily available technology
- Have a ‘voice’ outside of the classroom
- Longevity – reuse year on year
- Consistency – key messages can be delivered to multiple groups
“podcasts increased the feeling of proximity between students and teachers, because students had the feeling of a permanent presence of their teachers. As a consequence, the podcasts enhanced students’ motivation.” (Koppelman 2013)
“a combination of different communication media can be beneficial for the learning process of many students” (Fernandez et al, 2009).”
Making an educational Podcast
The steps to creating a Podcast can be broken into 3 distinct steps:
- Planning
- Creating
- Delivery
What you’ll need – the basics
- Something to talk about – Assessment guidance, weekly update, industry news etc.
- Microphone – This could be webcam mic or mobile device mic
- Recording device – Usually a laptop or mobile device
- Quiet space – This helps to deliver a clear message
- A way to deliver and share it to your audience
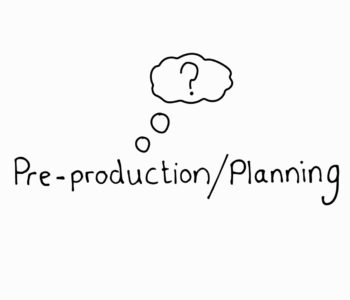
Planning
In the planning stage you will need to think about the intended purpose of the podcast; the audience, the content, and how you will present yourself.
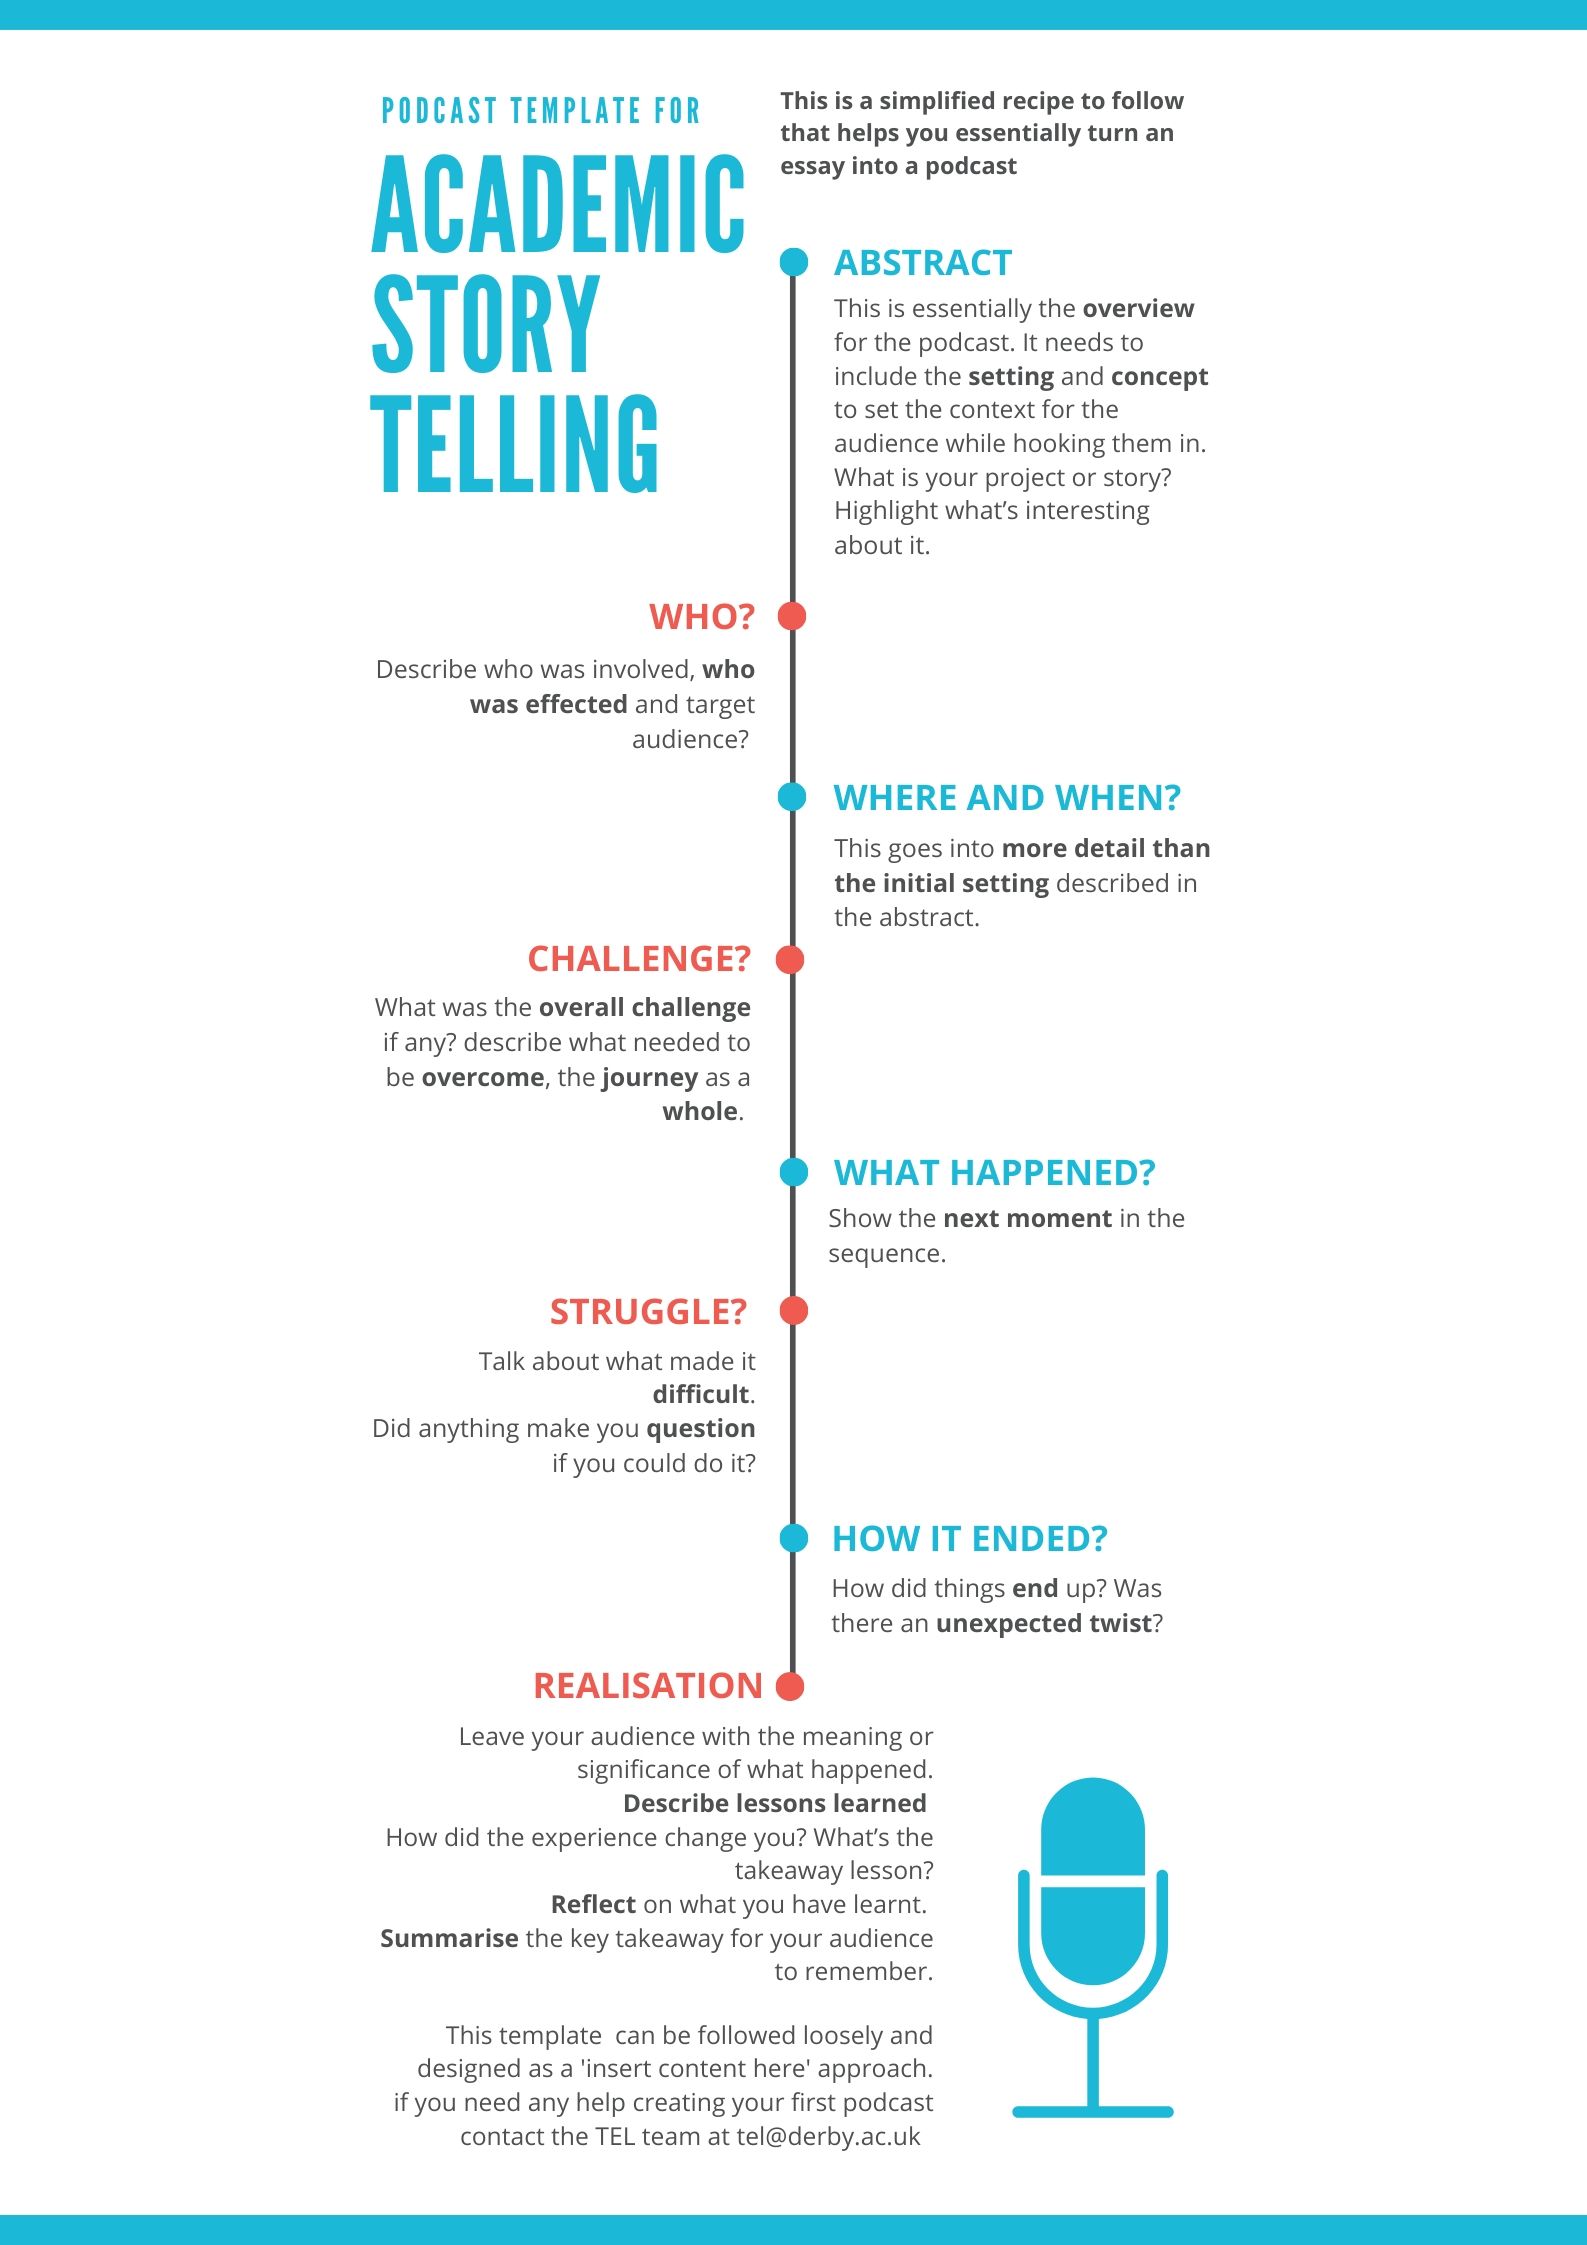
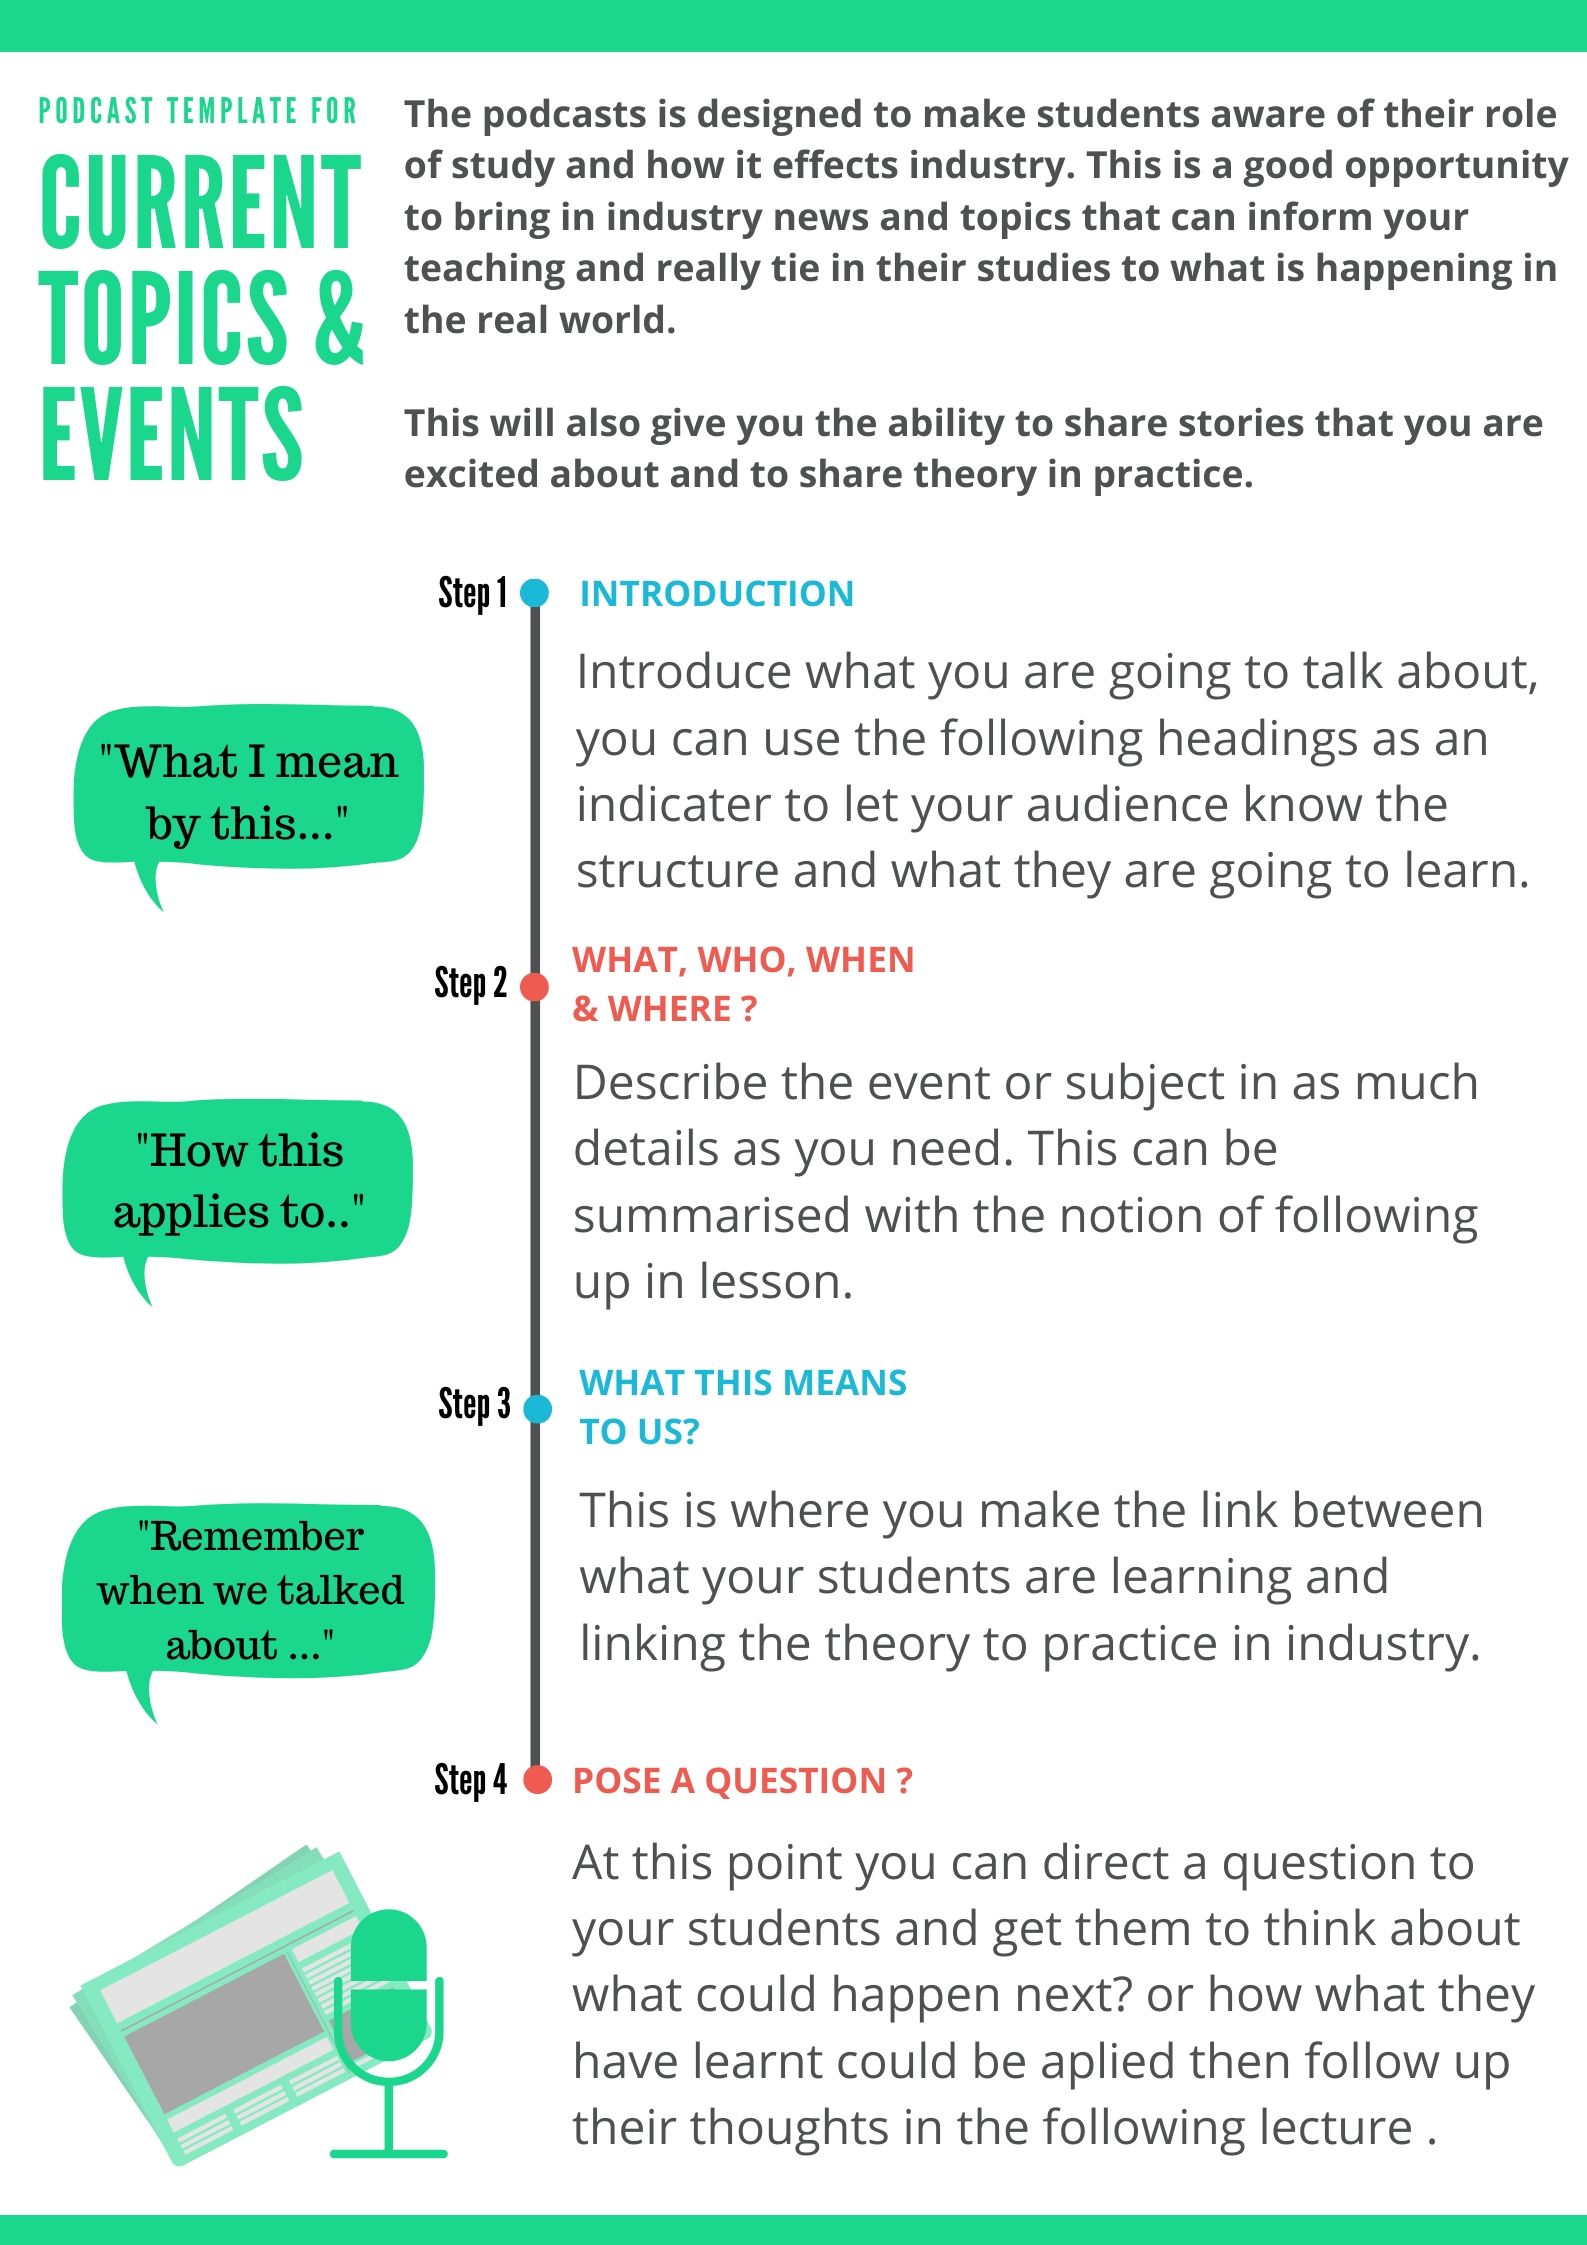
We have created a number of ‘recipes’ that set out a basic idea and structure for creating a podcast. These templates aren’t set in stone and are designed as as starting point to be adapted to fit your needs. Click on the images to enlarge.

Tips on content
- Have a basic plan with a beginning, middle and end
- Keep it short; 5-10mins
- Be your authentic self – it’s better received
- If you’re stuck, get inspiration from other podcasts or our podcast recipes above
- Don’t over think it, you’ll know your subject knowledge
- The more directly connected your content is to assessments, the more likely it is to be used
- Try not to start the recording with “ok…” or “so…” but instead with addressing your audience, “hello everyone…”
Tips for presenting yourself
- Be yourself
- Be mindful of your audience – they know you!
- Be enthusiastic about your subject
- Use conversational language
- Be succinct and to the point
Creating
There are a number of different tools you could use to create a Podcast, any simple audio recorder on either a computer or mobile device will work. Choose the one that you feel most comfortable with to start with.
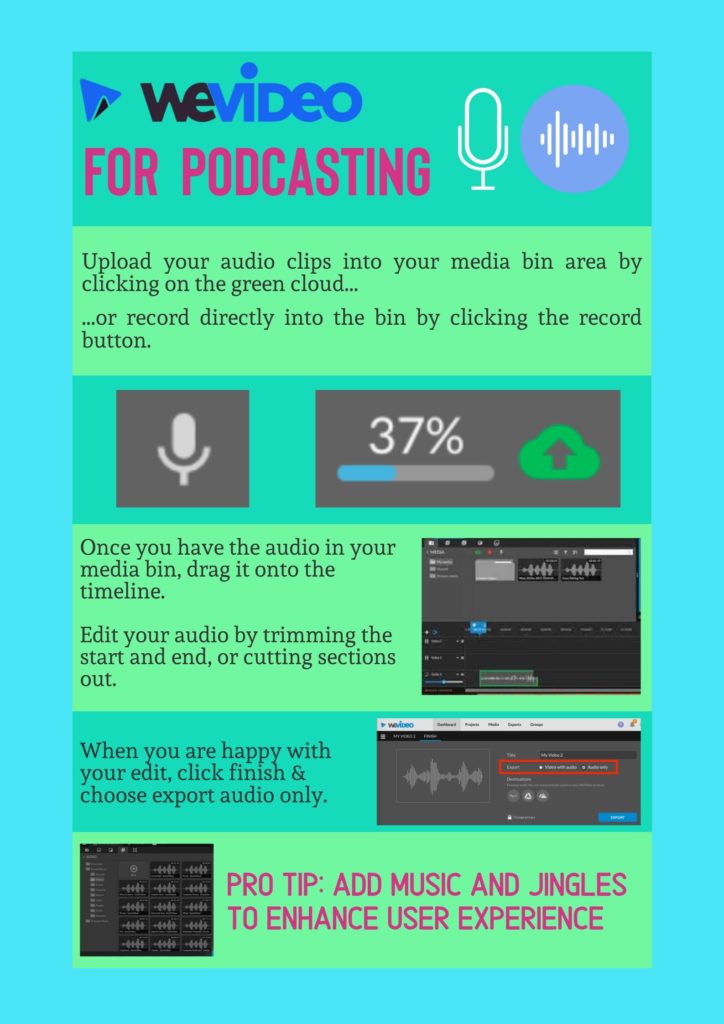
The university has supported tools that are also ideal for recording audio. You can use Panopto; the lecture recording system, or WeVideo; an online video and audio editor.
Creation tips
- Stay close to the mic when recording
- Avoid touching the mic
- Give yourself a couple of seconds after pressing record and stopping at the end to make sure you wont cut off any audio when recording
- Record in a smaller room if possible as this will have less echo
- Make a couple of short practice recordings to get comfortable with the equipment, and test sound quality
- Have fun with it and experiment
Delivery
Once your podcast is created, a way to deliver it to your audience is needed. They may wish to listen to the podcast in a number of ways, therefore a file or stream which can work on any device should be created.
Most audio programs will give you the ability to export your audio as either a .mp3 or .mp4 file. Either of these should work on most devices. These files have benefits as they are small and universal whilst retaining quality. Avoid using .wmv files if you can.
As an academic the podcast could be uploaded to Course Resources, students will then be able to stream them directly from Course Resources or download to their own device.
The recording could also be uploaded to Panopto and shared as you would a normal lecture recording. You may want to give the audience the ability to download the recording to increase portability and options.
Further help
If you would like any help and advice on creating a Podcast please contact the TEL team at tel@derby.ac.uk and we will be happy to help.